the_sky_calls: (Default)
Mission Designation : ND-11
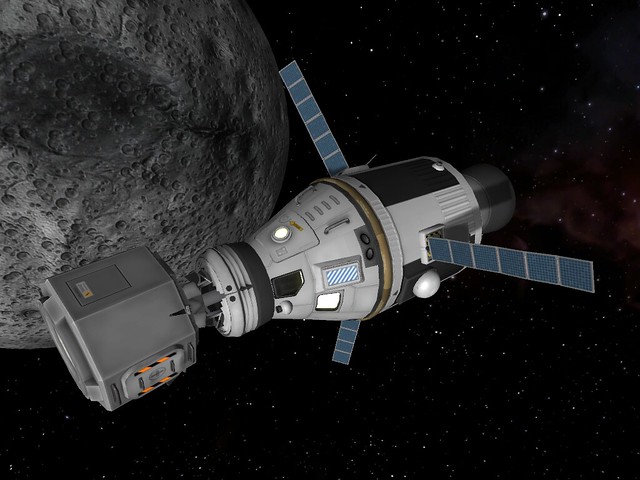
Rocket Model : Nereid A-II
Mission Objectives : Recover Sigsted and his Module from Mun orbit
Total Mass (Mass to Orbit) : 96.5 tons (16.6 tons)
Total delta-V (dV to Orbit) : 6,225 m/s (2,639 m/s)
Surface TWR : 1.46
Part Count : 49
Contract for Construction : Year 4, Day 285
Nominal Build Time : 17 days
Total Cost : 54,491 funds
Launch Site : KSC
Launch Date/Time : Year 4, Day 303
Pilot : Kelhat Kerman
Engineer : Frando Kerman

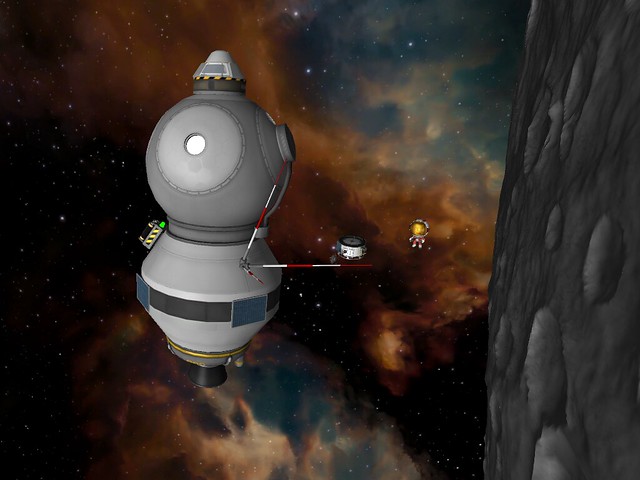
The contract was to rescue Sigsted Kerm from Munar orbit and also to bring back the capsule he was in and everything was normal until the rescue craft entered the Mun’s sphere of influence and it was realized that they were going the wrong way.

Typically, craft in low Munar orbit are travelling west to east, like most craft in Kerbin orbit. Sigsted’s module, those, was traveling in a retrograde orbit, east to west and I had set up a rendezvous approaching head on.

The Nerid craft, designed for asteroid encounters, had a lot of surplus delta-V and could well have brought its relative speed with Sigsted’s craft to zero and still had plenty of delta-V to complete its mission of returning them all back to Kerbin. Instead, I decided to enter a highly elliptical orbit and then, when the craft reached apoapsis, reverse course. Moving slower at a high apoapsis means it takes less delta-V to reverse course than it would at the time of interception in a lower orbit.

After an extra day of fiddling about to change orbits, the rendezvous and capture was effected without further incident.


Mission Summary
Mission Elapsed Time : 4 days, 5 hours
Landing Site : Ocean 24 km east of KSC
Science : 6 points

the_sky_calls: (Default)
Gemtop Kerman got himself and his module trapped in low Minmus orbit. So, I sent an automated single-crew capsule to rescue him. Easy peasy.

Three days later, Keldock Kerman also got himself trapped in low Minmus orbit. Without a module. There was already a rescue on its way to get Gemtop but that craft could only bring back one. So, what to do.

I could send another craft. Actually, I was intending to do some crew rotation at Minmus Orbital Station (M.O.S.) Isaly anyway so I should have sent a three-crew capsule in the first place. I’ll still be sending that capsule but, in the meantime, Keldock is going to just rescue himself.


Normally, you can’t switch over to a non-owned Kerbal or module. But the Kerbal Alarm Clock mod allows you to cheat that restriction. Go into the Tracking Station, select the Kerbal, and create anm alarm. Once the alarm is created you can click on it and select Jump to Ship. Ta da, you have control of the Kerbal and you can set about putting him to work.

The EVA Jetpack contains monopropellant for 600 m/s of delta-V. Keldock at about 7km altitude wanting to change his orbit to 30 km where M.O.S. Isaly is is only going to take about 44 m/s of delta-V. The challenge is that Kerbals on EVA cannot have maneuver nodes to figure out their trajectory. But with so much surplus delta-V available, poor transfers can be adjusted again and again until it works out.

And so, after about an hour and a half, Keldock jets up to M.O.S. Isaly. Without any sort of radio communication with an Kerbal on EVA, I’m sure it was surprising to hear a knock on the space station hatch.

With the Snacks! mod, Kerbals that are generated by the game to be rescued shouldn’t be recognized by the mod and so not need anything to eat until an active craft comes within the 2.5 km physics range. At least, that’s what the mod website says. Unfortunately, that is not what actually happens. It’s not physics range that triggers the munchies, it’s having an active ship within the sphere of influence. As soon as Keldock was made active and set about rescuing himself, Gemtop started eating his snack. Or rather, he would have eaten snacks if the capsule had any. The larder was empty so he started complaining about being hungry and those complaints started costing the space program money and reputation.

So, I switch over to Gemtop, have him exit his Mk2 Lander Can, and use his EVA jetpack to fly to M.O.S. Isaly.

Knock. Knock.

the_sky_calls: (Default)
Three weeks or so back, a Lunaria-class mission was launched to rescue Newsel Kerman from the Mun’s northern highlands. That mission didn’t go so well when pilot Genepond hit the wrong switch and decoupled the Mk1-3 Command Pod from the service/landing module instead of throttling up the engines to leave the Mun’s surface.

Thus, they were not going to be leaving the Mun’s surface.

An older model Zovan-class ship was rushed through production and, with a Probodobodyne HECS attached, was going to go and rescue the now three Kerbals trapped on the Mun.

Mission Designation : ZV-6
Rocket Model : Zovan A-IIIb
Mission Objectives : Rescue crew from the Mun
Total Mass (Mass to Orbit) : 117.1 ton (16.1 tons)
Total delta-V (dV to Orbit) : 7,029 m/s (3,668 m/s)
Surface TWR : 1.17
Part Count : 63
Contract for Construction : Year 4, Day 204
Nominal Build Time : 19 days
Total Cost : 50,319 funds
Launch Site : KSC
Launch Date/Time : Year 4, Day 222 @ 02:34

A commentary on flight controls. The original Zovan-type ship (Craft file), which would be piloted, had a Small Inline Reaction Wheel attached to provide control. It provides 5 kNm of torque. When the Probodobodyne HECS was added, the Small Reaction Wheel was removed because the HECS has its own integral reaction wheel. However, the probe core’s reaction wheel has one tenth the torque at 0.5 kNm. It is enough to control the craft but it is sluggish. I’ll put it back on the next version.

Because the wreck site is at a high latitude, a mod-course correction is in order but the change of view can make lining up on the target a little bit tricky. I can eyeball the trajectory to pass over the landing sight roughly but won’t know just how good that trajectory is until the craft has entered the Mun’s sphere of influence.

When that happened, I wasn’t far off but the periapsis of the fly-by trajectory was well past the landing zone. I could have adjusted and attempted to come straight down on the landing zone but I think that would take more delta-V and, even if that wasn’t the case, would be probably less precise. Since precision was important (not wanting the rescued Kerbals to need to walk many kilometers to their rescue craft), I brought the craft into orbit first and then adjusted the orbit to line up on the wreck site on the next pass.

A practiced flight path brought the rescue craft down about 50 meters from the wreck site. Given that the previous mission had been able to put down 15 meters from the initial target, I’m sure I could have managed that with this landing as well but I had other plans. There were Kerbal Attachment System mod explosives aboard to blow up the wreck.

There are a lot of objects being tracked in this game and I am noticing that the number is beginning to affect system performance on my laptop. The solution is to eliminate unused, redundant, or dead satellites, unnecessary flags, debris, and anything else that needs to be tracked. I could just go into the Tracking Station view and eliminate them but, given the opportunity, I will do so in game.

With explosives.


The explosives on the service/landing module also destroyed the Mk1-3 Command Pod sitting next to it but somehow didn’t destroy the landing gear which, now that the fuel tank they were attached to was gone, simply fell over into a heap.


That’s some bad physics calculations right there.

The most efficient return to Kerbin from the Mun or Minmus involves leaving orbit parallel to the moon’s orbital path. This is pretty easy to set up when transferring from an equatorial orbit but slightly more tricky when leaving from a higher latitude or near the pole. For this, the best way is to take a sighting on Kerbin and launch to orbit perpendicular. That lines up the orbit so that a tangent parallel to the orbital path is lined up.

For example. This mission had the wreck site pretty close to the pole but also with Kerbin almost directly to the south. Launching perpendicular to that, to the east, lines up the orbit.

But, let’s say that we were again near the pole but Kerbin was on the horizon much more to the west. In this case, perpendicular to Kerbin would be almost due south (or north). This polar orbit would have it’s transfer to a parallel transfer orbit at one of the poles as well.

Mission Summary
Mission Elapsed Time : 2 days/23 days/68 days
Landing Site : Ocean 281 km southeast of Nye Island Tracking Station

The Zovan mission was two days out and back to retrieve everyone. The initial rescue mission (plus the time getting back) was 23 days. Newsel Kerman had been stranded on the Mun 45 days longer than that.
the_sky_calls: (Default)
Most of the rescue-from-orbit contracts involve a Kerbal that has become trapped in orbit with their module. Year 2 of my career playthrough had 16 rescues, and Year 3 had half as many. Now a quarter of the way into Year 4 and I have had two rescues, but this time without modules.

The Kerbals in orbit with just their space suits.

It is strange, and fun, to imagine the circumstances that would find them in such a predicament. Were they forces to abandon ship? Did they go on an EVA and then have their crewmates forget they were out there and come home? Given this is Kerbal Space Program, either seems just as likely.


On rescuing Phofurt Kerman from orbit, another contract immediately appeared to rescue someone else from orbit as well. That portents a string of contracts coming up. This mission flew an automated Yivotanang B-V which is really a 3-crew transfer craft designed to rotate crew from a Kerbin orbiting space station. Too much spacecraft for the mission. Rescue missions had been launched with automated 2-crew Chiravot-class craft so I could take up an engineer with some KIS/KAS explosives to destroy the empty module. If Kerbals are now going to get themselves trapped in orbit without a module, I will start adding an automated Quicksilver-variant to the Kerbal Construction Time queue for these rescue missions.

It’ll be cheaper that way.
the_sky_calls: (Default)
Lots of things to do on this mission. Primarily, the Anomaly Surveyor add-on to Contract Configurator still has anomalies to find. TMA-6 is to be found near the northwest rim of the Northern Basin.

Referencing the Temporary Kerbal Maps website, the terrain of the area is pretty steep but there are some very small spots where the slope is flat. These will either be the tops of hills or the saddles between hills. The resolution of the map makes it hard to tell which it is but I suspect the monolith will be found on top of a hill. There shouldn't be a problem landing there.

There is another contract to “Plant a flag on the Mun.” One would think that would be easy but I think I forgot to do that on the previous munar mission.

Tech level advancement has purchased a new experiment; the Seismic Impact Hammer from the DMagic Orbital Science mod. (Details below).

There is also a contract to perform an observation with the DMagic Orbital Telescope while docked at M.O.L. Celestia and return it to Kerbin.

And though not a contract, in visiting the munar orbital station, and engineer and scientist will be rotated, bringing Bill and Sebastien home and replacing them on station with Frando and Berby.

Mission Designation : LUN-7
Rocket Model : Lunaria A-VI LM (Craft file)
Mission Objectives : Investigate TMA-6. Telescope Observation at M.O.L. Celestia
Total Mass (Mass to Orbit) : 241.2 tons (36.5 tons)
Total delta-V (dV to Orbit) : 7,422 m/s (4.064 m/s)
Surface TWR : 1.44
Total Cost : 124,949 funds
Contract for Construction : Year 3, Day 317
Nominal Build Time : 38 days
Launch Site : KSC
Launch Date/Time : Year 3, Day 363 @ 04:35
Pilot : Bilwel Kerman
Engineer : Frando Kerman
Scientist : Berby Kerman

At just short of two minutes into the ascent, the Dang It! mod generated a gimbal failure on one of the Protyle-style booster's six RE-I5 “Skipper” Liquid Fuel Engines. Were it a general failure, I might have had to shut down the Skipper opposite it to keep the thrust balanced. At that point of the flight, the loss of two engines would not have prevented the craft from reaching orbit. That is, so long as the failure was not explody. If the engine was overheating, it could have lead to an exposition, necessitating the use of the Launch Escape System. With just a gimbal failure, the thrust vectoring of the other engines was sufficient to keep the craft fully under control for the remainder of the ascent.

The transfer to the mun and orbital insertion was nominal. Optimal, in fact, because the trajectory into orbit lined up nearly perfectly with the landing zone with less than a full orbit to the deorbit burn. Recall the last time the craft needed to stay in orbit for nearly two days as the Mun rotated beneath it to get lined up on the landing.


I was right about the hilltop location of the monolith. There was a flat zone perhaps 300 meters across on top of a very steep sided dome structure.

The Dmagic Orbital Science mod includes a two-part science package. The first part consists of a Seismic Impact Hammer which is exactly what it sound like, a piston that thumps into the ground to send out seismic waves and listen for the reflection to determine the makeup of the subsurface. The system also includes Seismic Sensor Pods. These are small, discus-shaped probes that are hurled away from the craft with small decoupler charges. When they come to rest, their dispersal can improve the science returns from the Seismic Impact Hammer by 20%.

The problem is the decoupler. The charge goes off and the probes are hurled away from the craft. If they impact the ground at too high a velocity, they will be destroyed. You can adjust the decoupling force, like you can with any decoupler, but you need to do that in the VAB before launch. Set it too high and the velocity will be too high and destroy the probe. Set it too low and they won't be thrown far enough away to gather good science.

Another thing that can affect the survivability of the sensors is the terrain. Decouple them on flat terrain and their ballistic arc will have them impacting with the same velocity they left with. But, on top of a hill as this landing was, the sensor would fall below the elevation of the launch, accelerating further.

I had three sensors and was launching them with the default decoupling force.

The first one ended up landing at a lower elevation than it started, exploding on impact of about 73 m/s.

The second also landed at a lower elevation than it started but hit 2.8 km from the launch point at about 70 m/s and survived, skipping like a stone across the munar surface. Eventually, it slowed down but as it was on a slope it began to roll down the hill. And roll. And roll. It rolled for nearly half an hour before finally coming to rest at the bottom of the hill 2.4 km away from the craft.

The third sensor exploded like the first, slamming into the basin wall.

With one sensor, the hammer was only able to provide 70% of its optimal science.

The landing site rests in the Midlands biome and because I had landed in a midlands biome previously and set up a Surface Experiment Package there, I had decided not to bring a redundant SEP. That was a mistake because that previous landing was earlier in the tech tree when I only had two experiment modules. There are now seven modules available and I could have set up five of that seven that hadn't been deployed as yet. On the plus side, though, the midlands module is a pretty common place to land and so I will try to remember to pack an SEP on a future mission.

So, having done all the science available on the surface and planting the requisite flag, it was back to orbit to rendezvous with M.O.L. Celestia. Once there, the Orbital Telescope observation was performed and collected and the 495 points of science researched by the Mobile Processing Lab MPL-LG-2 since the last crew rotation was transmitted. The lab will replace those points at a rate of 9 points a day.

Even after the 45 degree inclination change, the Lunaria-6 craft had docked with the station with 542 m/s of delta-V. Needing only about 300 m/s of dV to break munar orbit and return to Kerbin, that extra fuel would be useful as I also realized that there was a contract available that I had missed during mission planning. Raying Kerman was trapped in munar orbit and needed rescuing. And so, instead of bringing Sebastian home as originally intended, he would remain on station until the next mission so as to leave an open seat on the Lunaria-6, which would rescue Raying and bring him home.


Mission Summary
Mission Elapsed Time : 3 days, 1 hour
Landing Site : Ocean 43 km east of KSC
Science : 36 points

the_sky_calls: (Default)
A craft was put into the Kerbal Construction Time queue as soon as the contract to rescue Ronney Kerman from the surface of the Mun was accepted. The nominal build time for a Zovan-class lander is 24 days but there were several other craft ahead of it in the queue so it was going to take longer.

In the stock game, that extra time doesn't much matter. Kerbals trapped in space will wait patiently for years with no ill effects. Even with the Snacks! mod installed, they aren't supposed to start complaining about not having snacks until they are under your control or you have entered physics range of 2.5 km. Unfortunately, that doesn't seem to be the actual case. As soon as a craft exited Kerbin's low orbit to interact with one the the moons, Ronney started complaining that he was hungry.

The Snacks! mod has a setting to disable that for specific Kerbals. I would put Ronney's name into that field but it didn't seem to work either. Ronney kept complaining and administrators continued to assess penalties for letting him go hungry. The Science penalties were irrelevant because he had no science collected. The money penalties were 10,000 funds each but I had a large reserve of funds so that wasn't going to hurt. The reputation penalties, though, those were hard earned and the loss of a few points every couple of hours could significantly hurt the space program's overall reputation.

I want to still be loved so the only thing left was to rescue him quickly.

I had a Lunaria-class craft ready and waiting in storage, but it was planned for a very specific mission on Minmus. I didn't want to reconfigure that and start building a replacement.

The Zovan-class craft that was in the queue, even if pushed to the head of the line, was still 17 days from completion. Kerbal Construction Time allows you to push completion by 10% by spending 10,366 funds. I had 6 million funds in the bank so I just clicked on that button a bunch of times until I got the completion time down to 2 days.

Mission Designation : ZV-5
Rocket Model : Zovan A-IV LM (Craft file)
Mission Objectives : Rescue Ronney Kerman from Mun's Surface
Total Mass (Mass to Orbit) : 124.2 tons (16.5 tons)
Total delta-V (dV to Orbit) : 6,977 m/s (1,736 m/s)
Surface TWR : 1.10
Contract for Construction : Year 3 Day 297
Nominal Build Time : 24 days
Total Cost : 51,831 funds
Launch Site : KSC
Launch Date/Time : Year 3, Day 311 @ 05:52
Pilot : Valentina Kerman
Engineer : Albur Kerman


The craft did not enter Munar orbit well and did not have the surplus delta-V necessary to correct it, the result being it had to wait in orbit for three days while the Mun rotated underneath it and brought the location of Ronney's wreckage in line. In that time, Ronney continued to complain and the space program lost 8 more points of reputation.

Previous missions using the SCANsat mod had produced a low resolution RADAR scan of the Mun's surface. This produces a map view which, theoretically, will provide slope information to help you find a flat place to land. However, the low res scan doesn't give much detail and so is of limited usefulness. Instead, I just looked out of the window on the last pass before landing to get a view of the landing zone.

Ronney's crash site was on the ejecta blanket just south of an overlapping pair of impact craters. From low orbit it looked pretty flat so long as I didn't get too close to the crater rim. If it turned out to be steeper than it looked, I could just land short to be further away from the craters.

Another resource in trying to assess a landing zone is available at the Temporary Kerbal Maps website. Its slope map is better than that provided in-game by SCANsat because it has a color coding for a given slope. If the color is black, it's flat. If it's very dark red (almost black) the slope is no more than 5 degrees, which is pretty darn flat. Only when the red starts to show on the map is the slope getting to be something you might not want to try to land on.

Zooming in on the latitude and longitude of Ronney's crash site shows a slope that was 5 degrees or less.

Excellent.

I will do a precision landing by doing staged burns towards the zenith of the landing zone. That is, I start by building a maneuver node that uses up all the fuel remaining in my transfer stage, placing the maneuver as far from the near side of the landing target as the deorbiting path intersects with the ground on the far side of the landing target. Imagine the arc of the de-orbiting path and divide it by two.

Then, I will make a series of burns at about the 1/3 mark that tightens up the arc of the deorbiting craft until it is nearly vertical, coming straight down on the target.


When using a waypoint to mark the target, you can get reasonably close. Using the in-game map view that comes with SCANsat you can get even more precise. But if, as in this case, you have an actual something on the ground you can target, you can get even more precise because you'll be able to see that target icon in the navball. Much like docking, you can push your retrograde marker around to end up right on top of the target marker and, with practice, can come down right on top of it.

I have done just that; had to wave off the landing a little bit to avoid landing directly on top of the target. I haven't done it myself but others have connected with docking ports in such a manner.


I didn't land that precisely but ended up 27 meters from the Ronney Kerman and his Mk2 Inline Cockpit, much better than most of my previous landings which have generally been a few hundred meters away.

Mission Summary
Mission Elapsed Time : 5 days, 5 hours
Landing Site : Ocean 260 km southwest of Impact Crater


When I decoupled from the Service/Landing module just before reentry there was an alarming explosion. During design, as I was trying to optimize placement of the RCS thrusters, I had attached them to the integral decoupler of the KV-3 'Pomegranate' Reentry Module instead of the FL-A151S Fuel Tank Adapter just below it. The explosives of the decoupler destroyed the RV-105 RCS Thruster Blocks and left the Place-Anywhere 7 Linear RCS Ports floating magically below the module.

I'll have to correct the craft file.

The rescue contract paid out 234,547 funds and added 14 points of reputation. This makes up for the penalties assessed to the space program for Ronney complaining about not having enough Fritos and Mountain Dew.


the_sky_calls: (Default)
Mission Designation : YT-20
Rocket Model : Yivotanang B-III
Mission Objectives : Rescue Tanbart Kerman from low Kerbin orbit
Total Mass (Mass to Orbit) : 40.2 tons (6.0 tons)
Total delta-V (dV to Orbit) : 4,905 m/s (1,372 m/s)
Surface TWR : 1.28
Contract for Construction : Year 2, Day 409
Nominal Build Time : 26 days
Total Cost : 29,294 funds
Launch Site : KSC
Launch Date/Time : Year 3, Day 14, 02:29
Pilot : Jebediah Kerman
Engineer : Bobfield Kerman

Mission Statistics
Total Mission Time : 11 hours, 21 min
Landing Site : Grasslands 357 km east of KSC (on peninsula)

There was nothing particularly noteworthy about the mission itself as the rescue and return was effected nominally without incident. Subsequently, though, there were no rescue contracts currently on the books so two Yivotanang spacecraft in the Kerbal Construction Time queue were moved down in priority so attention could be focused on the upcoming Munar orbiting laboratory and a mission outside of Kerbin's SOI.

And on another note; this mission landed on the Korean-looking peninsula to the east of the Space Center (which itself is on an African-looking subcontinent). I think it would be useful to have names for some of these features and some mods and multiplayer games that have been developed for KSP do give some of these locations names but, in stock, they are unidentified.


the_sky_calls: (Default)
Utilizing a Hohmann transfer to the Mun is easy and fairly default. With the Mun in it's orbit at about the 2 o'clock position, build a maneuver node at the 6 o'clock position and draw the prograde tool out until you get a Sphere of Influence encounter. You then pull the prograde tool more delicately, watching the Mun periapsis until it is to what you want.

The result is an orbit that travels west to east, the way that most modules needing rescue are orbiting.

But this is not the way astronauts go to the moon in the real world. Look at illustrations from the Apollo program and you will see a characteristic figure-8 path. This is called a free return trajectory and it has a safety feature built into it.

If you look at the path you build for a typical KSP transfer, watch what happens as you go from an SOI encounter to a closer Mun periapsis. The path after passing the Mun tracks out a larger and larger orbit and eventually escapes Kerbin's SOI altogether. If something went wrong with the engine when you wanted to enter the Mun's orbit, the craft might instead be flung out into deepy space.

But spend just an additional 10 or 15 m/s of delta-V and you will see that path swing around and start to tighten up closer to Kerbin. It doesn't look it in map view but this is the figure-8 free return trajectory. Make it just a little bit tighter and you can set the path to that the periapsis returning to Kerbin is about 24 km, a guaranteed return even if the engines fail.

If the engines do work, the result is a Munar orbit that travels east to west. A retrograde orbit.

And this is exactly the orbit necessary for this mission because Sebastien Kerbin is trapped in a 242 km retrograde orbit and needs rescuing.

Mission Designation : YT-17
Rocket Model : Yivotanang C-III MOS
Mission Objectives : Rescue Sebastien Kerman from Minmus orbit
Total Mass (Mass to Orbit) : 48.3 tons (7.4 tons)
Total delta-V (dV to Orbit) : 5,388 m/s (1,837 m/s)
Surface TWR : 1.42
Contract for Construction : Year 2, Day 344
Nominal Build Time : 28 days
Total Cost : 33,674 funds
Launch Site : KSC
Launch Date/Time : Year 2, Day 390, 00:07
Pilot : Magmin Kerman
Engineer : Asdo Kerman

The Munar transfer, and retrograde orbit went according to plans. The subsequent rondezvous with Sebastiens's module, because it was in a fairly high orbit, took the better part of a day to accomplish but, again, the mission proceeded nominally.

It has been my habit to user Kerbal Attachment System/Kerbal Inventory system to attach a Z-100 Rechargeable Battery Pack, OX-STAT Photovoltaic Panel, and an HG-5 High Gain Antenna to the craft, turning what would otherwise be useless debris cluttering orbit into a discount relay satellite. I chose in this instance to attach an explosives package to the module to blow it up, eliminating the debris altogether, because I though a communication satellite in a retrograde orbit would be less useful, the retrograde orbit shortening the communication window with any satellite.

Mission Statistics
Total Mission Time : 3 days, 0 hours
Landing Site : highlands 164 km NW of Dessert Launch Site


Explosives

Jul. 12th, 2018 08:56 pm
the_sky_calls: (Default)
In the early game, there are contracts to rescue Kerbals from competing space programs that have become trapped in orbit. The mission is pretty straight forward; go up with a craft, have the Kerbal EVA over to that craft, come home. But that leaves the module they were in still in orbit cluttering up space.

Space is big so there is a lot of room up there to leave things essentially lying about. The odds of running into one of those bits of debris accidentally is extremely low.

But not zero.

So, if you can, you want to not leave stuff up there. In the case of booster stages, I design them in such a way that I can discard the stage before completely circularizing the craft's orbit and have the booster reenter the atmosphere and burn up. Those modules you are rescuing Kerbals from are a different matter. With the Tech Level 6 node Actuators you get the Advanced Grabbing Unit with witch you can grab things and haul them down out of orbit,.

But the Tech Level 6 node Precision Engineering is more valuable. It has the Probodobodyne HECS probe core, the Communotron DTS-M1, the RA-2 Relay Antenna, the very useful Cubic Octagonal Strut, and, if you also have the Kerbal Inventory System mod. . .

EXPLOSIVES!

As if Kerbal rockets weren't explody enough.

KIS/KAS allows you to attach a block of explosives to any object and blow it up. After attaching the explosives part, you select the Setup button which gives you two settings to change. The first is the countdown time which defaults to 10 seconds. Ten seconds is not a lot of time so you will want to make he delay longer. I tend to set it to 180 seconds. Three minutes is plenty of time to get to a safe distance.

The second setting is the Explosive Radius. This is how big the explosion is. The default is the maximum of 10 meters, which is plenty for blowing up a single module but if you want to decommission a space station, it might not be enough.

The third button is Activate. Click this and then get the hell away because there is no way to stop the countdown. I have accidentally selected Activate before changing the timer and so needed to get away fast to not get caught in the explosion. To avoid that I went to GameData\KIS\parts\bomb1\part.cfg and changed the the default to delay = 100. That way it gives me at least 100 seconds instead of just 10.

Mission Designation : YT-6
Rocket Model : Yivotanang B-III
Mission Objectives : Rescue Lingor Kerman from low Kerbin orbit
Total Mass (Mass to Orbit) : 40.2 tons (6.0 tons)
Total delta-V (dV to Orbit) : 4,905 m/s (1,372 m/s)
Surface TWR : 1.28
Contract for Construction : Year 2, Day 283
Nominal Build Time : 25 days
Total Cost : 29,294 funds
Launch Site : KSC
Launch Date/Time : Year 2, Day 319, 05:16
Pilot : Magmin Kerman
Engineer : Joepont Kerman


The space above Earth has about 1,500 functioning satellites and some 17,800 other objects large enough to be tracked. But there are also an estimated 29,000 pieces of larger debris, 670,000 pieces of debris between marble and baseball sized and 170,000,000 bits of debris smaller than a marble. All moving at orbital speeds. A paint flake moving at 29,000 km/h will make a significant crater in laminated glass.

That's a lot of junk but, again, space is big. Really big. Even with that much stuff up there, the distances between each piece is fairly large so the odds of running into anything significant is pretty small. Even so, it is suspected that at least 8 satellites have been destroyed by space junk, each one adding thousands if not millions of pieces to the orbiting mine field.

It the real world, blowing something up with a block of explosives would be an absolutely insane things to do. Explosions do not turn things into a cloud of harmless vapor. Explosions turn things into death swarms of millions of tiny things, all moving at orbital velocities. The movie “Gravity” was a fairly awful movie but it does sort of present how badly debris in space could be.

And then each piece of debris that hits something else will cause even more debris. Theoretically, this could cascade to the point where there is so much debris in orbit that every satellite already up there would be destroyed and any attempt to launch a spacecraft through that hell storm would also be destroyed. Kessler Syndrome could trap us on Earth.

Thankfully KAS explosives will vaporize things within a certain radius, leaving no debris whatsoever. And the game is able to track any piece of debris. Plus, some debris such as aeroshell panels, simply cease to exist once they are outside of the 2.5 km physics limit.

And so, after Lingor Kerman was rescued and Joepont blew up his module, Magmin piloted the craft to rendezvous with a debris module from a previous mission and Joepont blew that up, too.


Mission Statistics
Total Mission Time : 1 hour, 53 min
Landing Site : 381 km east of KSC


the_sky_calls: (Default)
According to the documentation and the conversations on the forums, the Snacks mod isn't supposed to implement having the Kerbals needing rescue from orbit eating until an active craft enters physics range at 2.5 kilometers. Theoretically, a Kerbal trapped in orbit can remain in orbit indefinitely.

However, that has not been my experience. It seems that way for Kerbals trapped in Kerbin orbit but, for a Kerbal trapped in the Mun's or Minmus's orbit, as soon as an active craft enters the body's sphere of influence, the Kerbals that need rescuing open up the storage lockers, see that there is nothing there, and start complaining.

The solution is to not accept a contract to rescue a Kerbal unless the next ship heading out to the Mun or Minmus is prepared to rescue said Kerbal. If that's not the case, the Snacks mod will check every day and start assessing penalties. It could loose science but, since the Kerbal needing rescue hasn't done any science, the penalty in that case is irrelevant. The mod could assess a 10,000 fund fine. Ouch.

The mod could also have the Kerbal pass out from hunger and eventually starve to death. I have turned off that setting because I consider snacks to be snacks, like candy bars and chips, things that Kerbals like and want and may do a crappy job if they don't have, but not something necessary for survival.

So, Danly Kerman was trapped in orbit needing rescue. The previous mission had been in Minmus orbit to rescue another Kerbal from orbit and, having seen the mission arrive in Minmus's sphere of influence two weeks earlier, Danly had been complaining ever since. That mission wasn't in the position to rescue two Kerbals so rescue needed to wait until another rescue craft was completed in the Kerbal Construction Time queue and launched.

Mission Designation : YT-10
Rocket Model : Yivotanang C-III MOS
Mission Objectives : Rescue Danly Kerman from Minmus orbit
Total Mass (Mass to Orbit) : 48.3 tons (7.4 tons)
Total delta-V (dV to Orbit) : 5,388 m/s (1,837 m/s)
Surface TWR : 1.42
Contract for Construction : Year 2, Day 262
Nominal Build Time : 27 days
Total Cost : 33,674 funds
Launch Site : KSC
Launch Date/Time : Year 2, Day 300, 05:51
Pilot : Topmund Kerman
Engineer : Doodbury Kerman

Danly's module was in a high orbit so the rescue craft needed a course correction. I did the course correction and then switched to another craft because missions to Minmus take 9 days and while the spacecraft is coasting your space program can do other things.

When I switched to that other craft, I received a warning of a monopropellant leak from the Dang It! mod. I thought it was weird because the other craft was a relay satellite without any RCS or monopropellant tanks.

But by the time I had switched back to the Yivotanang C-III on its way to Minmus, all of its monopropellent had drained away. For some reason, the alarm had sounded after I switched away.

The Yivotanang C-III craft has 10 Stratus-V Minified Monopropelant Tanks. Should one of them spring a leak, you can click on the transfer button and lock it down so that, once it is empty, it doesn't drain the other tanks. Because I had switched to another craft and didn't realize the leak was on this craft, all the monopropellant drained away.

Thankfully, for this mission, monopropellant wasn't required. It would be more tricky to do a close rendezvous with the rescued craft so that the Engineer could transfer over the HG-5 High Gain Antenna to turn the debris module into a bargain communication relay, but it was still doable.

Danley's module was in a high orbit. High orbits mean long orbital periods which means taking longer to set up an orbital intercept. In this case it took six full days before rendezvous. Danley complaining about being hungry the whole time.

Mission Statistics
Total Mission Time : 25 days, 5 hours
Landing Site : 795 km east of KSC


the_sky_calls: (Default)
Mission Designation : YT-4
Rocket Model : Yivotanang C-III MOS
Mission Objectives : Rescue Crisrod Kerman from Munar orbit
Total Mass (Mass to Orbit) : 48.3 tons (7.4 tons)
Total Delta-V (dV to Orbit) : 5,388 m/s (1,837 m/s)
Surface TWR : 1.42
Contract for Construction : Year 2, Day 144
Nominal Build Time : 28 days
Cost : 33,674 funds
Launch Site : KSC
Launch Date/Time : Year 2, Day 207, 01:25
Pilot : Magmin Kerman
Engineer : Bill Kerman

The mods Kerbal Inventory System and Kerbal Attachment System (KIS/KAS) allow you to carry parts along and then attach those parts while your Kerbal is on EVA. After I rescue their crew, I like to then attach a Z-100 Rechargeable Battery Pack, OX-STAT Photovoltaic Panel, and an HG-5 High Gain Antenna to the craft, turning what would otherwise be useless debris cluttering orbit into a discount relay satellite. While the battery and solar panel can be carried by the Engineer, without an extra storage part, the HG-5 Antenna is too large to be stored in the capsule or carried by the Engineer.

Having one attached to the outside and then detaching and reattaching it to the other module is easily accomplished if the two craft are near enough. But on this flight, deploying the aeroshell at 70 km tore off the antenna. This is a risk when setting the aeroshells to clamshell deployment as, instead of the aeroshell separating into dozens of tiny pieces, it has only two pieces. In retaining that mass, it is not thrown away by the decoupling charge with as much velocity and can run into things, such as the antenna.

Thanks Isaac Newton.

Without the antenna, of course, it won't be able to be attached to the orbiting capsule, leaving it as just debris. For the next flight there are several options. Rotating the antenna 180 degrees will move it away from the part of the aeroshell that impacted it, lessening the chance for impact. Adjusting the aeroshell from 2 to 3 or even 4 clamshell pieces. Or not using clamshell deployment at all. Just use the stock aeroshell that files apart into a dozen tiny fragments.

But the clamshell is cool.

Mission Statistics
Total Mission Time : 2 days, 4 hours
Landing Site : 74 km north of Dessert Launch Site
Science Earned : 45 points


the_sky_calls: (Default)
Two weeks ago (in game) with mission YT-4 and the rescue of Crisrod Kerman from Munar orbit, I have been receiving warnings that Joepont, also trapped in Munar orbit, was out of snacks. From what I hear from the Snacks mod discussion on the KSP Forums, these rescue modules are not supposed to start applying the hunger settings unless the craft becomes active, which is only supposed to happen if you have an active craft within the physics range of 2.5 kilometers.

This is apparently not the case. Simply sending a craft to the Mun will apparently active all the craft in Munar orbit, at least as concerning snacks, and they will start to get hungry.

There is a setting that will have Kerbals without sufficient food passing out or eventually dying of hunger. Since the stock game allows Kerbals to travel anywhere for any length of time without an apparent means of life support I just sort of assumed they were plants surviving on photosynthesis. The addition of snacks is not necessary for survival but, like potato chips and candybars to humans, are necessary for happiness. I have the setting in the Snacks mod such that if they don't get their snacks there will be a loss of science, a loss of reputation, or fines.

10,000 funds is a big chuck of money to loose for not having a Snickers.

I did not have a Mun-orbit capable ship in storage and so I needed to advance production in Kerbal Construction Time. A Yivotanang C-III, at the head of the production queue at this stage, will take 27 days to complete. This particular craft had been contracted but, as it was down in the queue, other craft were being prioritized. I immediately pushed the craft to the head of the line. I also spend an additional 6,000 funds to reduce construction time by 10%. And again by another 10%. But that is 10% of the already reduced time so additional reductions will cost a lot of less return. Spending 6,000 additional funds to avoid a 10,000 fund fine is one thing but doing it again and again yields diminishing returns.

Mission Designation : YT-6
Rocket Model : Yivotanang C-III
Mission Objectives : Rescue Joepont Kerman from Munar orbit
Total Mass (Mass to Orbit) : 48.3 tons (7.4 tons)
Total delta-V (dV to Orbit) : 5,388 m/s (1,837 m/s)
Surface TWR : 1.42
Contract for Construction : Year 2, Day 193
Nominal Build Time : 27 days
Cost : 33,674 funds
Launch Site : KSC
Launch Date/Time : Year 2, Day 223, 00:21
Pilot : Megcal Kerman
Engineer : Doodbury Kerman

The launch, Munar transfer, and rendezvous proceeded nominally.


I have the mods Kerbal Inventory System and Kerbal Attachment System (KIS/KAS) installed. Those mods allow you to carry parts along and then attach those parts while your Kerbal is on EVA. It allows you to do things like attach struts to reinforce two docked craft. You can connect fuel lines between two landed craft to transfer resources. What I like to do with craft left in orbit after I rescue their crew is attach a Z-100 Rechargeable Battery Pack, OX-STAT Photovoltaic Panel, and an HG-5 High Gain Antenna to the craft, turning what would otherwise be useless debris cluttering orbit into a discount relay satellite.

Mission Statistics
Total Mission Time : 2 days, 5 hours
Landing Site : 846 k m southwest of Woomerang Launch Site


the_sky_calls: (Default)
Competing space programs are every bit as capable as your space program except that they keep getting the kerbonauts trapped in space. Even in orbit around the Mun. Rescuing them from there for profit is not very much different than rescuing them from Kerbin orbit but there are some additional challenges beyond just getting to the Mun.

In this case, Tompmund Kerman's module is in a high, 21 degree inclined, Munar orbit.

Mission Designation : YT-3
Rocket Model : Yivotanang C-III MOS
Mission Objectives : Rescue Tompmund Kerman from Munar orbit
Total Mass (Mass to Orbit) : 48.3 tons (7.4 tons)
Total delta-V (dV to Orbit) : 5,388 m/s (1,837 m/s)
Surface TWR : 1.42
Contract for Construction : Year 2, Day 77
Nominal Build Time : 29 days
Cost : 33,674 funds
Launch Site : KSC
Launch Date/Time : Year 2, Day 154, 04:21
Pilot : Megkal Kerman
Engineer : Doodbury Kerman

If you are transferring to a low, equatorial Munar orbit, your burn from low Kerbin orbit is pretty straightforward. In Map View, you watch the Munar periapsis marker and adjust your burn till that number is where you want it. Fifteen kilometers is a reasonable target if you are planning on then landing on the Mun. But, it you are trying to meet up with something in a higher inclined orbit, you are going to have to right-click on the Mun in Map View and select “Focus View”

There, you will see the target's orbit and your goal is to get your craft's path to intersect that orbit with your craft's Munar periapsis. If you are making adjustments to be closer or further away from the Mun, the best time to do that is at or right after your transfer burn. That is the most efficient. But, if you then need to adjust the inclination, that correction burn is best done about midway between Kerbin and the Mun.

Again, you want to build that maneuver in such a way that your Munar periapsis intersects with the target orbit. That way, when you make your orbital insertion burn, you can build a single maneuver node there that not only circularizes the orbit but matches the target;s inclination.

After that, it's a matter of engineering a rendezvous as one would in Kerbin orbit.

A trip to the Mun, landing, and returning, can be done in a little under 3 days total. But if you are in a higher orbit, each time around can take a day or more. If you end up in a bad spot in the target's orbit, it could take several orbits, and thus several days, to finally get a rendezvous. I have installed the Snacks mod and so each craft has limited food. It wouldn't do to run out of food while trying to get a good intercept. Especially when the Kerbal trapped in Munar orbit might have already been complaining about not having any snacks.

A KV-3 “Pomegranate” Reentry Module will carry 150 units of snacks, good to feed a crew of 3 kerbals for 16 days. For a trip to the Mun and back, and one seat empty for most of the trip, that should be sufficient for the rescue of Tompmund Kerman, even if it takes a few high orbits to rendezvous. Remember for the future, though, that's probably not going to be good enough for a rescue in Minmus's orbit.

On this mission, Megcal stuck the intercept and was able to effect a rendezvous in one orbit of several hours. Engineer Doodbury EVAd and using the Kerbal Inventory System and Kerbal Attachment System (KIS/KAS) mod was able to attach a Z-100 Rechargeable Battery Pack, an OX-STAT Photovoltaic Panel, and a HG-5 High Gain Antenna to the now abandoned module, turning it into a Mun orbiting relay satellite without having to spend any funds to launch a rocket there.


Mission Statistics
Total Mission Time : 3 days
Landing Site : 234 km east of KSC

One of the major concerns approaching reentry was how the KV-3 Reentry Module would fare falling from the Mun. The module only has 20 points of ablator when stock heat shields have hundreds of points. As Captain Mal Reynolds said, "We may experience some slight turbulence . . . and then explode."

The module hit Kerbin's upper atmosphere at 2,831 m/s. As it fell to the thicker parts of the atmosphere and reentry effects grew, the module temperature climbed to 1,728 K, nearly three quarters of the module's maximum temperature rating. But then the temperature started to decline after only burning off one half of one point of ablative. OK for returning from the Mun but troubling for a return from Minmus where the module would hit the atmosphere at over 3,000 m/s.

That test is for a future flight.


the_sky_calls: (Default)
Once you get into space, contracts start appearing to rescue Kerbals who have been trapped in orbit. The stock game takes a crew capsule of some sort, places a Kerbal inside, and puts it in orbit. The game will chose crew modules from parts mods as well, regardless of whether those modules have hatches or not. Without a hatch, the Kerbal trapped inside has no way to EVA and exit the module.

The Advanced Grabbing Unit available in the Actuators node at Tech Level 6 can do that job. When your Grabbing Unit grabs a module, craft, or asteroid, it becomes, in game mechanics, a single craft and you can then transfer a crewmember from one module to another.

Except that I don't have that yet.

What I do have is the Kerbal Inventory System and Kerbal Attachment System (KIS/KAS) mod. This mod allows you to attach and detach parts on site. You can attach struts to a pair of docked modules to make that space station less wobbly. You could land one craft next to another and then attach a fuel line between the two to transfer resources. You can add lights or antennas or science packages to craft in orbit when you forgot to add those parts in the VAB.

And you can add docking ports.

On a previous mission, I had some difficulty extricating a Clamp-O-Tron Docking Port Jr. stored inside a Making History expansion SM-18 Service Module. For this mission, I'm going to bypass that problem by mounting two docking ports on the outside of a KV-3 “Pomegranate” Reentry Module.

The KV-3 is an analogue to the Soviet Voshkod 1, essentially a Vostok capsule with three seats jammed into it instead of just one. With three crewmen, the Voshkod had no room for the crew to wear spacesuits. The Russians only did that once, though. The KV-3 IVA seems to show that the Kerbals have plenty of room inside, suits and all. It is also available before the Advanced Grabbing Unit (and the three-crewed Mk1-3 Command Pod), in Tech Level 5's Advanced Flight Control node.

Mission Designation : YT-2
Rocket Model : Yivotanang B-III
Mission Objectives : Rescue Doodbury Kerman from Kerbin orbit
Total Mass (Mass to Orbit) : 40.2 tons (6.0 tons)
Total delta-V (dV to Orbit) : 4,905 m/s (1,372 tons)
Surface TWR : 1.28
Contract for Construction : Year 2, Day 77
Nominal Build Time : 29 days
Total Cost : 29,294 funds
Launch Site : KSC
Launch Date/Time : Year 2, Day 144, 01:35
Pilot : Magmin Kerman
Engineer : Bill Kerman

After ascent and rendezvous, Magmin maneuvered the craft right up to the Stockalike Station Parts mod PTD-5 “Sunrise” Utility Module. Bill EVAd and, while still holding on to the KV-3, detached the docking port and reattached it to the PTD-5. Then, Magmin backed off a little bit, turned the craft to line up the docking modules, and docked.


Mission Statistics
Total Mission Time : 1 hour, 19 min
Landing Site : 366 km east of KSC


the_sky_calls: (Default)
Gerbert Kerman was still trapped in orbit. But on the previous mission, a Clamp-O-Tron Docking Port Jr. was attached to his PTD-6 “Star” Module so that, when this next craft met it in orbit, the two craft could dock and Gerbert could transfer to the Mk2 Command Pod and return home.

Mission Designation : CV-2
Rocket Model : Chiravot C-II
Mission Objectives : Rescue Gerbert Kerman from Kerbin orbit
Total Mass (Mass to Orbit) : 45.5 tons (6.9 tons)
Total Delta-V (dV to Orbit) : 5,288 m/s (1,596 m/s)
Surface TWR : 1.3
Contract for Construction : Year 1, Day 42
Launch Site : KSC
Launch Date/Time : Year 2, Day 42 05:56
Engineer : Bob Kerman

Before docking, the two craft must rendezvous. The craft trapped in orbit is usually in fairly circular orbit of around 85 km altitude. Launching from KSC when the target craft is over the Great Desert, where the new Dessert Launch Site is located, will allow you to get into orbit ahead of the target craft. When you make the circularizing node at apoapsis, you “swing wide” to a higher orbit to slow down and rendezvous with the target craft.

On this flight, I waited almost too long. I was able to have a 5 km intercept with the target craft on the ascent. In that case, with only 5km, difference, I set to target retrograde at the closest approach marker and reduced the relative velocity to zero. After that, it was using the main engines at a low throttle to approach the target.

Docking can be quite the challenge. Having a sense of 3D spacial relations is vital.

Use RCS or the main engines at low throttle to move your primary craft in front of the target craft. It can take a lot of getting used to how to interpret the target icon on the NavBall and where to point your level indicator to get where you want relative to the target.

Next, is lining up the ports. Start by right-clicking on the target port and “set as target.” Then you right click on your own port and “control from here.” This will give you more accurate data on distances between the craft because otherwise the information is relative to center of mass. You can use the “]” key to switch over to control of the target and see where the level indicator is pointing relative. Then, when you return to your craft, you can point your craft 180 degrees to that so that a straight line from your port and the target port are parallel.

When you do this, you will probably not be pointing directly at the target prograde marker on the navball. You are going to use “I, J, K, L” to line those up. This is called translation. If you pitch or yaw using the “W, A, S, D” keys you will be pointing straight at the target port but they will no longer be parallel. You will come in on the port at an angle.

Once that's all lined up, Use the “H” key to move forward and dock.

Or, do what I do and get the Docking Port Alignment Indicator mod. It's not automated docking but what it does do is present a display that shows all the information directly. Parallel docking ports are represented by a target prograde circle. Rotate so that is in the center of the screen and your ports are lined up. There are two green lines that represent the movement vector between the ports. Move your prograde marker to where those green lines cross and you will push them towards the center. When it all lines up, move in to dock.

I can help make dockings almost routine. I don't consider it cheating much at all because you are still doing the dock, you just have a graphical representation of all the vectors instead of having to just eyeball it.

And so, Bob's craft was able to dock with the PTD-6 “Star” Module and Gerbert was able to transfer over. Because the docking port had been attached on the previous mission there was really no specific reason for Bob to be there except as an engineer should something go wrong. Of course, at this point his skill level wasn't high enough to do much so, if something DID go wrong, there was a good chance Bob couldn't fix it anyway.


The two craft remained attached until the reentry burn. After which the PTD-6 “Star” Module was undocked and would thus be on a trajectory to fall to the ground. If you don't do something like this, all those craft from which Kerbals have been rescued will remain in orbit, cluttering up the space around 85 km altitude. Space is still pretty big so the odds of running into that debris is pretty low but it is not zero and if you can reduce it to zero by deorbiting the module, all the better.

Mission Statistics
Total Mission Time : 42 min
Landing : 179 km east of KSC

Forty-two minutes. With the lucky 5 km intercept on the ascent, the mission was accomplished in one orbit. It could have been even shorter had I not cared about landing close to KSC to get a better craft recovery return.


the_sky_calls: (Default)
Once you get into space, contracts start appearing to rescue Kerbals who have been trapped in orbit. Apparently competing space programs aren't as good as yours. (I haven't lost a Kerbal yet in this career.) The stock game takes a crew capsule of some sort, places a Kerbal inside, and puts it in orbit.

If you have any parts mods installed, those parts become part of the pool of crew modules that can be trapped in orbit. Unfortunately, there are a few moded crew modules that don't have hatches. The result is that the Kerbal trapped in orbit is also trapped in the module. Without a hatch he cannot EVA to transfer over to the rescue craft.

Thankfully, I have also installed the Kerbal Inventory System and Kerbal Attachment System (KIS/KAS) mod. This mod allows you to attach and detach parts on site. You can attach struts to a pair of docked modules to make that space station less wobbly. You could land one craft next to another and then attach a fuel line between the two to transfer resources. You can add lights or antennas or science packages to craft in orbit when you forgot to add those parts in the VAB.

Scientist Gerbert Kerman is in a Stockalike Station Parks Expansion mod PTD-6 “Star” Module in low Kerbin orbit. A Probodobodyne OKTO will be attached to a Gemini-like Mk2 Command Pod so that Bill Kerman can be flown up to rendezvous with the PTD-6. He will EVA, use KAS/KIS to take a Clamp-O-Tron Docking Port Jr. stored in an SM-18 Service Module, and attach it to the PTD-6. The craft will then dock, allowing Gerbert to transfer to the Mk2's empty seat.

Mission Designation : CV-1
Rocket Model : Chiravot C-II
Mission Objectives : Rescue Gerbert Kerman from Kerbin orbit
Total Mass (Mass to orbit) : 45.5 tons (6.9 tons)
Total Delta-V (dV to Orbit) : 5,288 m/s (1,596 m/s)
Surface TWR : 1.3
Contract for Construction : Year 1, Day 421
Launch Site : KSC
Launch Date/Time : Year 2, Day 34, 02:02
Engineer : Bill Kerman

That did not go according to plan.

For some reason, I could not point to and click on the docking port stored in the Service Module. The pointer kept selecting the Service Module itself. The module has panels covering the storage space and once those are deployed you should have access. It was acting as if the panels were still in place.

Bill was able to detach the docking port on the front of his craft and attach it to the PTD-6. While that did not allow Gerbert to egress, there is a second Chiravot C-II next in the construction queue. It was supposed to rescue Doodburry Kerman trapped in a PTD-5 “Sunrise” Module but now it will be redirected to dock with this PTD-6.

Doodburry will need to wait a bit longer.


the_sky_calls: (Default)
Mission Designation : YK-2
Rocket Model : Yivohkorog D-I
Mission Objectives : Rescue Doodcas Kerman from low Kerbin orbit
Total Mass :  25 tons
Delta-V : 4,642 m/s
Contract for Construction : Year 1, Day 303
Construction Time : 25 days
Launch Site : KSC
Launch Date/Time : Year 1, Day 379
Pilot : Valentina Kerman

The mission was to send up a pilot alone in a KV-2 “Pea” Reentry Module to rendezvous with a capsule in orbit and bring back the Kerbonaut trapped there. The launch was nominal. Circularization was nominal as well, able to manage a 2.9 km intercept.

At 8 minutes into the flight, the craft approached the target ascending node and prepared to perform an adjustment burn to bring the intercept even closer.

And the craft would not move. The Small Inline Reaction Wheel had failed, rendering the craft unresponsive.


The Dang It! Continued mod is an add on that adds random part failures to the game. It is not entirely random, as parts that are used a lot will wear out and be more likely to fail. Also parts that overheat will suffer the same degradation and be more likely to fail.

Once a part has failed, there are several options. Some simple parts, such as batteries, can be swapped out by any crew member. More complex parts require an experienced engineer to repair.

A Level 1 Engineer can repair alternators, control surfaces, deployable antennas, Fuel tanks, and rover wheels. A Level 2 Engineer is needed to repair coolant lines, air intakes, engine gimbals, and reaction wheels. It requires a Level 3 Engineer to repair decouplers, engines, and RCS.

Lacking a Level 2 Engineer, this reaction wheel failure could not be repaired.

The lack of a way to change the craft's attitude did not necessarily trap the craft in orbit. When the reaction wheel failed, the craft was aligned retrograde so, as the craft maintains its alignment, on the next orbit the engine would be pointing retrograde again. Activating the engine at that point would allow it to deorbit. The engine also has gimbaling so, when the engine was running, the craft could change its alignment somewhat.

Another option was to remain in orbit and await rescue. Opposing that idea (or perhaps not s opposing) is that I have also installed the Snacks! Mod. I have the settings such that Kerbals without snacks don't die but when they go hungry there are penalties. Loss of science (irrelevant on this mission), loss of reputation, or fines (10,000 funds). The KV-2 “Pea” Reentry Module has 100 snack units, which with a single Kerbal occupant, should be able to sustain her for 33 days. A replacement Yivohkorog D-I or an automated Quicksilver G-II could be constructed in 25 days, plenty of time for rescue before she starts going hungry.

Or not. On one of Valentina's previous flights, this one to orbit Minmus, she ate much more than the standard 3 snacks a day and ran out of food, costing science and reputation. I had changed the settings so that shouldn't happen this time but, then again, there should have been an audible alarm when the reaction wheel failed and that didn't happen so mods and their settings are not absolute.

A third option was to attempt to complete the mission. Exiting the craft and using the backpack RCS, one can move the craft around. It's not easy to push in one direction or another (you cannot use EVA RS when holding on to a ladder, for example), but given the right rotation you could then activate the engines at the right moment. If Valentina could move the intercept from 2.9 km to within 2.5 km, I could then switch to the other craft, EVA Doodcas, and have him jetpack over to Valentina's craft.

Completing the mission with a broken ship would be a badass thing to do. It could also, if done wrong, trap them both in orbit. Another ship could come to get them both, though.

In the end, I took the safe route and had Valentina deorbit on the next orbit when the engines aligned retrograde.

Without any flight control, the asymmetrical decoupling of the KV-2 module had the craft tumbling through much of reentry. Thankfully, the integral ablative shielding is distributed equally across the surface of the spherical module.


the_sky_calls: (Default)
As soon as your space program succeeds in going into space, it seems that other space programs on Kerbin attempt to do the same. Except that they do so poorly, trapping their Kerbonauts in orbit. Your space program is contracted to go up and bring them back.

So, you have to build a ship to do so. If you have advanced to Tech Level 5 Electrics, you can place a Probodobodyne OKTO on top of an empty Mk1 Command Pod and send it up. When it gets within 2.5 km of the target craft, you can use the “]” key to switch views, EVA the Kerbonaut, and have him or her RCS over to the empty capsule waiting to bring them home.

Craft file: Quicksilver G-II

In this case, I utilized the Making History expansion's KV-2 “Pea” Reentry Module to send up a pilot to do the job.

Mission Designation :
YK-1
Rocket Model : Yivohkorog C-II
Mission Objectives : Rescue Magmin Kerbin from low Kerbin orbit
Total Mass : 25.5 tons
Delta-V : 4,666 m/s
Surface TWR : 1.36
Build Time : 29 days
Launch Site : KSC
Launch Date/Time : Year 1, Day 341, 00:31
Pilot : Kelhat Kerman

Most rescues from low Kerbin orbit are in a fairly circular orbit around 85 km of altitude. You will want to launch ahead of the target craft because it is much easier to move to a higher orbit to slow down to match than it is to go to a lower orbit to speed up.

I typically launch my rescue craft from KSC when the target craft is over the Great Desert, where the new Dessert Launch Site is located now. Launch so that your apoapsis is only a kilometer or two above the altitude of the target craft.

Make sure you target the craft and when it comes time to circularize your orbit, watch the intercept markers. You will probably be able to plot an intercept on the next orbit by having a higher apoapsis than circularizing.

When you have a good intercept plotted, note the ascending and descending node markers. A maneuver at these points will reduce the relative inclination, allowing an even closer intercept.

When you are at about 90 degrees from the intercept, that is a good time to make some more orbital adjustments to get an even closer intercept.

The final approach, the actual rendezvous, is the dangerous part. Collisions are possible. First off, some math that can help to avert disaster.

The intercept mark in Map View shows you the closest approach distance. If you are inexperienced and justifiability concerned about an actual collision, make sure that number is not 0.0 km. Keeping it at 0.1 km ensures that you will intercept at over 100 meters, much less of an opportunity for collision.

The Map View intercept mark also shows you the relative velocity at closest approach.

Kerbal Engineer will show you your vessel's actual thrust in meters per second.

So, with this, you can calculate the ideal burn to bring your relative velocity to zero at closest approach. Take the relative velocity and divide it by the craft's thrust. Then divide that by two. For example, let's say that the velocity at closest approach is 40 m/s. The craft's thrust is 8 m/s. 40 divided by 8, divided by 2 equals 2.5. That means if you start your engines at full throttle 2.5 seconds before closest approach, you will decelerate to zero at closest approach.

Perfect.

And kind of scary. Real spacecraft rendezvousing in orbit might take hours or even days to build a rendezvous at a very gentle approach speed. We've already set up an intercept that is blazingly fast. We can manage it in smaller chunks.

Set your NavBall point of reference to Target. As you watch your intercept time in Kerbal Engineer (or by switching over to Map View) decrease, you are going to see several markers on the NavBall. The retrograde vector marker, the yellow circle with three hash marks on the outside in a triangle, represents your motion relative to the target. The retrograde target marker, a pink dot with three hash marks in a triangle represents the location of the target relative to the back end of your craft. If those two markers are lined up you are moving backwards directly at the target.

If those two are not lined up, moving your level indicator, the center of the track ball on the opposite side of the retrograde vector from the retrograde target marker and activating your engine will push the the retrograde maker towards the target. The further your level indicator is away from the retrograde vector, the more you will push it towards the target marker.


This will also slow down your approach velocity.

I tend to use 45 and 30 seconds as bookends. I will watch the time to intercept and when it gets to about 30 seconds, I will fire up the engines to either move the retrograde markers or simply slow down. When this changes the time to intercept to about 45 seconds, I will stop decelerating and again wait for it to get back to 30 seconds.

As you get closer and closer you will use the Shift-key to make small thrust adjustments instead of the “Z” of full thrust. At a hundred meters or so you can bring your relative velocity to zero. Use the “]” key to switch to the rescue craft, EVA the Kerbonaut, and have them RCS over to the rescue craft.

With practice you will be able to bring your one craft to within a dozen meters of the the target craft. You probably don't want to get any closer than that without using RCS because the exhaust of the engine directed retrograde at the target craft will actually push it away and cause it to tumble. Also, I'm pretty sure the Kerbonaut within would not appreciate a facefull of rocket.

Mission Statistics
Total Mission Time : 1 hour, 19 min

The Yivohkorog C-II rocket cost 15,500 funds to construct. The rescue contract paid out over 59,000 funds.

Profit.

Plus you add a new Kerbonaut to your roster instead of having to pay to hire someone. It's even better than an internship.


Profile

the_sky_calls: (Default)
Capt Kordite

May 2025

S M T W T F S
    123
4 5678910
11121314151617
18 19 202122 23 24
25262728293031

Syndicate

RSS Atom

Most Popular Tags

Style Credit

Expand Cut Tags

No cut tags
Page generated Jun. 19th, 2025 06:47 am
Powered by Dreamwidth Studios